Clawdbot has been renamed to OpenClaw, Claude AI got upset by the name choice!
Why OpenClaw?
OpenClaw is the first AI assistant that genuinely works for you – not just answering questions, but remembering context, taking action, and operating like a real member of your team. Hand it tasks and it handles them: pulling data, automating workflows, dealing with the tedious stuff that drains your time and focus.
But more than that, it works with lots of skills which let it access all sorts of different providers’ technology offerings. Give it the skills and it can also act as a WhatsApp customer service bot, an email bot, make telephone calls for you, get at information and data hidden from general web browsing, all sorts of things.
Why use a VPS (Virtual Private Server) for OpenClaw?
You can run OpenClaw on your own computer. But running it on a separate server unlocks what makes it truly powerful:
- Always on. Your laptop sleeps, restarts, travels with you. A VPS doesn’t. OpenClaw can check your inbox, monitor for opportunities, and take action at 3am while you’re asleep (if you want it to).
- Works while you’re offline. Close your laptop, go outside, fly somewhere — OpenClaw keeps running.
- You decide exactly what it can see and touch. Do you really want an AI with unrestricted access to your everyday computer? Some people do – and that can unlock incredible possibilities, but there are significant security risks. We prefer clear boundaries and deliberate control. By running it on a separate machine, the AI only has access to what you explicitly allow, nothing more.
- No resource drain. Your machine stays fast and clean. The work happens elsewhere.
- Accessible from anywhere. Message it from your phone, a hotel, your friend’s computer. Always reachable.
It’s genuinely changed how I work. The catch? Setting it up isn’t exactly click-and-go if you’re not technical. So I wrote this step-by-step guide for non-developers. No assumed knowledge. Just copy, paste, and follow along.
By the end, you’ll have your own AI assistant running 24/7 in the cloud – checking things, doing things, always available.
Costs
- A $7 a month server from Hetzner (or even one of their $3 a month servers for the cost conscious!)
- OpenClaw itself is Open Source free (thanks Peter!).
- API access costs for any of the services you will use – OpenAI or you preferred provider being essential, you pay for AI requests as OpenClaw does tasks for you.
You have to pay for what you use for API use. Think of it as a business expense – OpenClaw is a team member that costs pennies per task. Use it a lot and it will cost you, but use it a lot for things that are useful to your business, well that cost has value.
Expectations
The developer community is going a little crazy over OpenClaw right now, and for good reason. It’s the first AI assistant that genuinely feels like a real member of your business team, not just a chatbot or a toy demo. That said, it’s not a glossy, shrink-wrapped product. It will take a bit of time to wrap your head around. If you’re a developer, using the command line to install it is second nature. For everyone else, it can trigger a bit of a glazed-over “wait… what?” feeling. You have to actually want to learn it and go through the setup. I’ve made it as simple as possible here, just copy and paste exactly as I’ve done it.
But the payoff is huge.
You get a front-row seat to what AI agents are truly capable of and how dramatically they can accelerate what your business can do. Big players like Microsoft, Apple, and OpenAI will absolutely release their own versions of this idea, but that takes time, layers of polish, and layers of restriction. OpenClaw’s real magic is that it isn’t tied to any single company or ecosystem. It’s open-source, community gold that works with a wide range of providers and APIs, adapts to you, and learns how you want things done. All without a sales department sanding it down to push only the products they want you to use.
Operating System
This guide is for Windows users setting up OpenClaw on a VPS (the VPS itself will run Linux, this guide details how to install it connecting from a Windows desktop).
Create a computer to run it on
People are buying mac mini’s like crazy right now to run OpenClaw on, but you don’t need one. A cheap cloud VPS works great. By installing on a separate computer to your desktop you can control what you give it access to and it’s always there in the cloud doing whatever you tell it. Any Linux VPS will do, for this guide we’re going to use a Hetzner VPS (Hetzner are the kings of low cost VPS’s currently).
Create a Hetzner account, go to the Console, Create a Project > Servers > Add Server
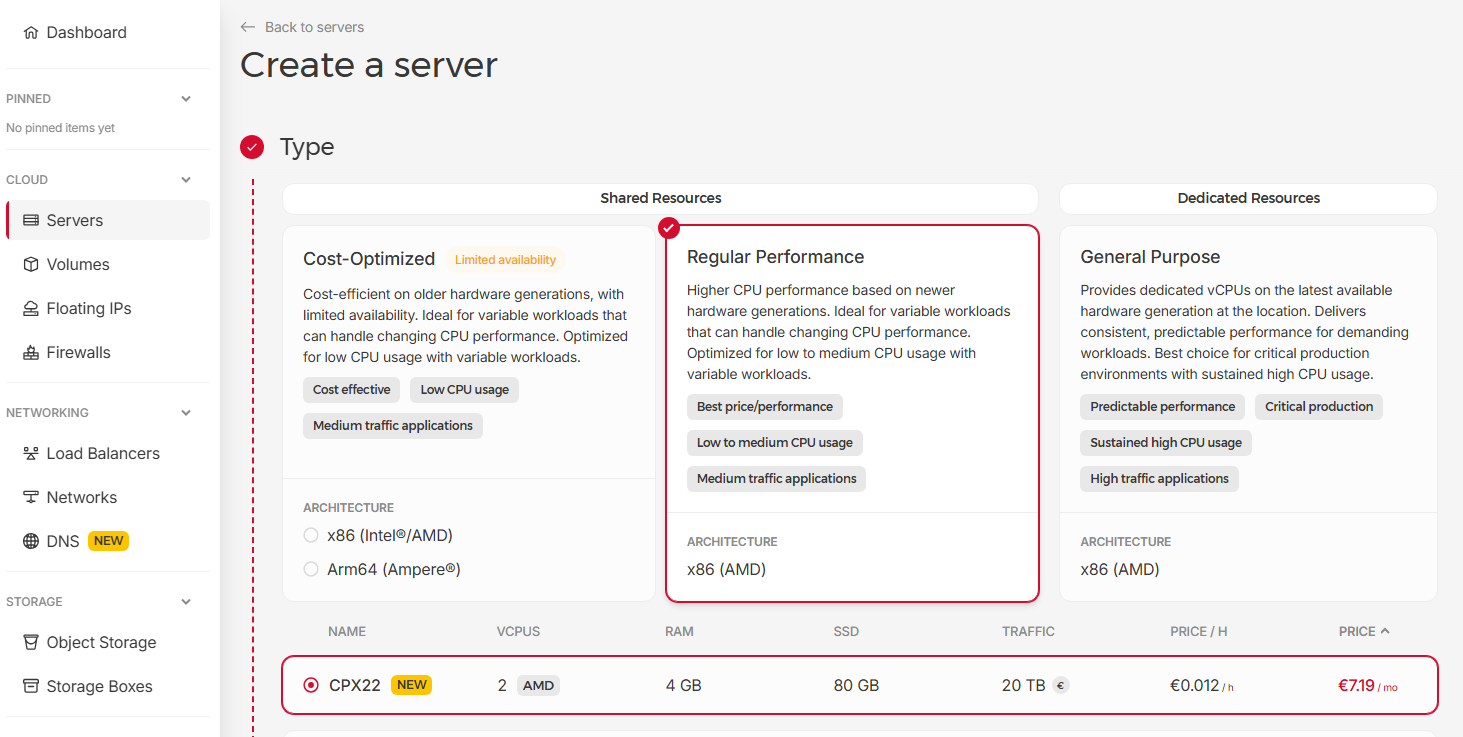
Select Regular Performance > CPX22 (OpenClaw runs fine on this, you can always upgrade it later if you become a heavy OpenClaw user). If budget is a concern then you can go Cost-Optimized and get a VPS for just $3, may just be a bit slower at times.
Ensure “Ubuntu” is selected for the “Image”
You can leave the rest of the server options as default, or change as you wish.
Buy it and wait for it to be created.
Apply a firewall
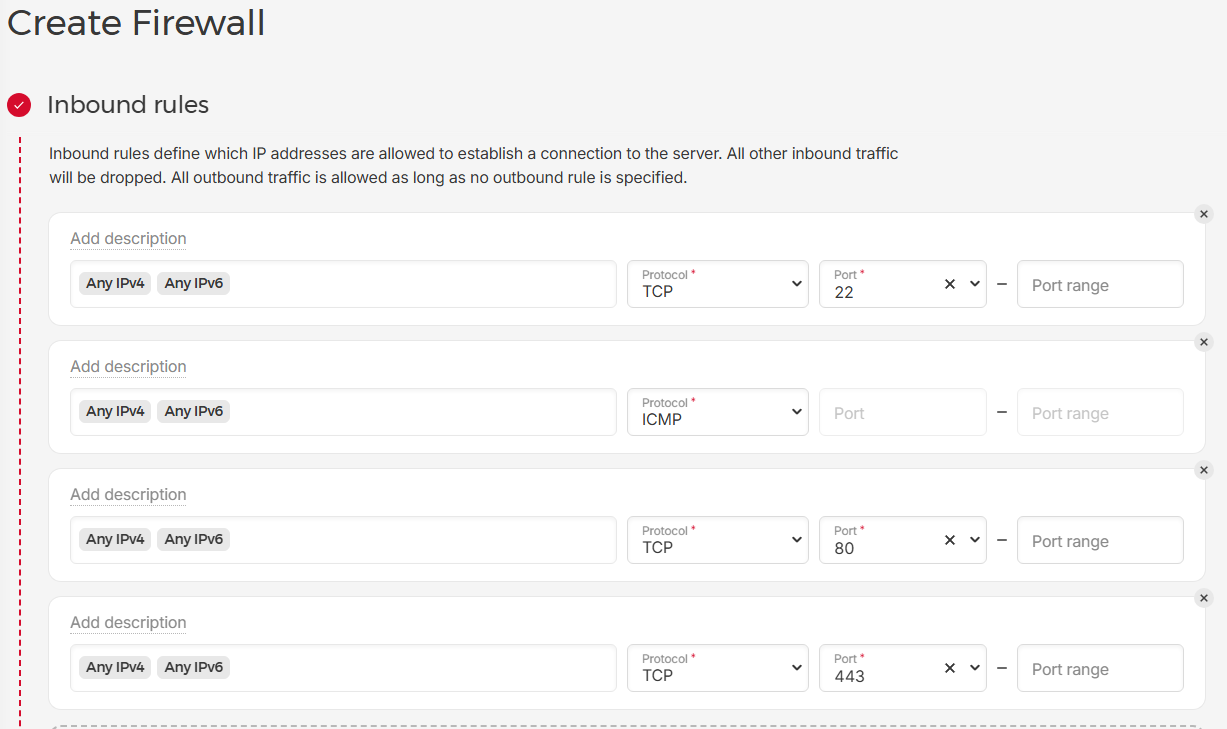
Its essential to protect the server from attack so Select “Firewalls” and create a new Firewall. Add the following rules:
- Incoming > TCP > Port 22
- Incoming > ICMP
- Incoming > TCP > Port 80
- Incoming > TCP > Port 443
So you have this:
Outbound rules > Leave blank
Apply To > Server > Select the server you just created
Hit the “Create Firewall” button
(You don’t actually need the 80 and 443 rules for this guide, but handy to have them there ready to go in the future if you get into having OpenClaw create a webserver on your VPS)
That’s it, you now have a secure dedicated computer running in the cloud costing you $7 a month.
Connect to your new server
Your cloud computer runs Linux (Ubuntu is a popular version Linux) – you’ll control it by typing commands. Sounds intimidating, but you’re just copying and pasting. I’ll tell you exactly what to type.
On Windows, open the “Terminal” app (search for “terminal” in your Start menu).
Hetzner will have sent you an email with your servers login. You want the IPv4 address, the 4 numbers before the “/32”. Enter this command into Terminal, changing the IP address to your servers IP address:
ssh [email protected]Enter “yes” to continue connecting.
Copy the servers password from your Hetzner email and paste it into Terminal (you won’t see it, just CTRL+V to paste and then hit return).
Create a new password when prompted, ensuring you store it somewhere safe (use our secure Password generator to create a strong password – very important as cloud servers get attack attempts constantly. DO NOT USE A WORD BASED PASSWORD, use a long complex password and just copy and paste it whenever you use it).
You should now have a command prompt like this:
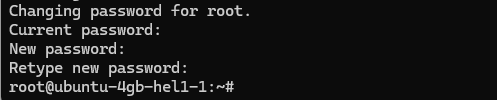
This is the “command line” and it is how you interact with the operating system of a cloud server.
Create a new user
Using the root user on Linux is a security risk and will also create problems down the road, so we need to create a new user called admin that we will use going forwards. Enter the following:
adduser adminCreate a new password when prompted, again ensuring you store it somewhere safe (use our secure Password generator to create a strong password – very important as cloud servers get attack attempts constantly).
Full name etc, you can just press enter to leave these bank.
Set user admin to be a sudo user (able to do system change things):
usermod -aG sudo adminUpdate the Operating System
You need to ensure any recent updates to Ubuntu are installed before you continue, enter these command:
sudo apt-get update && sudo apt-get upgradesudo apt install -y ca-certificates curl gitOnce complete, reboot the server:
sudo reboot nowGive it 30 secs to reboot and then reconnect using:
ssh admin@YOUR_SERVER_IP_ADDRESS_HEREPaste in the password you used for the new admin account.
Create a SSH tunnel so we can complete the OpenAI OAuth step when we install
To let OpenClawd using your Codex from your OpenAI ChatGPT subscription it needs to go through the Open AI OAuth process. To do that we need to create a SSH tunnel from your Windows desktop to the VPS. Open a new Terminal window on your computer and enter:
ssh -L 1455:localhost:1455 admin@YOUR_SERVER_IP_ADDRESS_HEREReplace YOUR_SERVER_IP_ADDRESS_HERE with IPv4 address for your server (without the “/32” at the end). Hit return and a secure SSH tunnel will be setup ready for OAuth to connect using your browser.
Leave this Terminal window open to keep the SSH tunnel open (don’t use it for anything else, this is the Terminal that just creates the SSH tunnel)
Install OpenClaw
Enter this command (just copy and paste it into Terminal):
curl -fsSL https://openclaw.ai/install.sh | bashHit return, paste in your admin password and the OpenClaw installer will fire up. Wait for it to do its thing (can take a while) and get to this prompt:
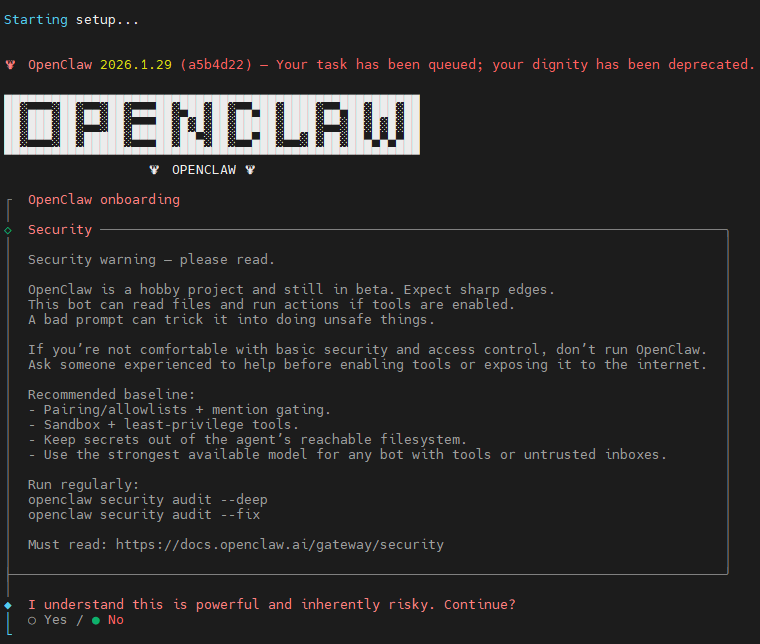
You’re going to be guided through the setup now. One note, don’t select text in the installer and use CTRL+C to copy, it can cause the installer to exit (re-run it if it does). You can paste no problem, but don’t leave where you are being asked for an answer.
Press your left button to select “Yes” and hit return.
Onboarding mode
Quickstart
Model/auth provider
Select “OpenAI (Codex OAuth + API key)
OpenAI auth method
Select “OpenAI Codex (ChatGPT OAuth)”
Select the URL it gives you and use CTRL+Insert to copy it (DO NOT USE CTRL+C)
Paste the URL into your web browser and go through the login and Continue steps to complete the OAuth. You should get a “Authentication successful” message, then return to the OpenClaw Terminal
Default model
Select the default OpenClaw suggests (you can change model later, or select your preferred model if you already use OpenAI)
Select channel
You can talk to your OpenClaw using a messenger app, Telegram is simplest to set up so we’ll do that now (you can add others later)
If you don’t already have Telegram on your mobile phone, download it from the App store.
In the Telegram app, open the chat with the “BotFather” and press “Open”
Create a New Bot > Give it a name (e.g. “My OpenClaw”) > create a unique username for it that ends with the letters “bot” (e.g. “Myname_OpenClaw”) > Create Bot
Press the “Copy” button to get the Telegram bot token and then paste it into the Terminal app OpenClaw installer (email it to yourself)
Configure skills now?
Yes
Show Homebrew install command?
Yes
Preferred node manager for skill installs
npm
Install missing skill dependencies
Skip for now (Space to select it, or select any you want to set up now, but skills can be added later)
Set #####_API_KEY questions
You can select No for all, unless you have them and want to give them to OpenClaw now
Enable hooks?
Skip for now
How do you want to hatch your bot?
Hatch in TUI
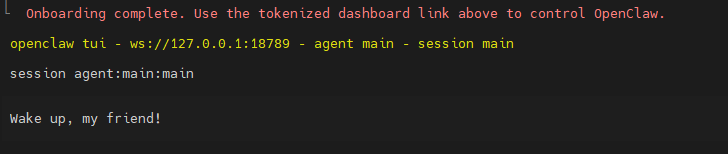
That’s it, OpenClaw is installed, you should see this:
Finally
Exit the OpenClaw TUI interface:
/exitNow install homebrew
/bin/bash -c "$(curl -fsSL https://raw.githubusercontent.com/Homebrew/install/HEAD/install.sh)" echo >> /home/admin/.bashrcecho 'eval "$(/home/linuxbrew/.linuxbrew/bin/brew shellenv bash)"' >> /home/admin/.bashrceval "$(/home/linuxbrew/.linuxbrew/bin/brew shellenv bash)"sudo apt-get install build-essentialReboot the server so all the OpenClaw install settings get used:
sudo reboot nowWait 30 secs then in the Terminal app enter
ssh admin@YOUR_SERVER_IP_ADDRESS_HERE(You can press your keyboard up key to get previous commands back to save re-typing). Hit return and you should now have the command prompt back like this:

To start OpenClaw chat again:
openclaw tuiThings to do now
Getting Telegram messenger working
Open the Telegram app on your phone, exit the BotFather chat and then search for the username you used to create your Telegram bot there (e.g. “Myname_openclaw”). Open it and press the “Start” button.
Send a message, e.g. “Hi”
You need to set OpenClaw to own the telegram bot you created, so get the Pairing code that will have appeared in your Telegram chat and in your Terminal OpenClaw enter:
openclaw pairing approve telegram YOUR_PAIRING_CODE_HEREYou should get a reply back from OpenClaw to your Hi message in Telegram, give it a few mins if it doesn’t immediately work or try the pairing approve command again.
Now lock it to only let you chat with it (so others on Telegram can’t message it) by sending a Telegram message like:
Only accept Telegram messages from meCheck that OpenClaw responds and acknowledges your request.
All done!
OpenClaw is yours now. Teach it how you work.
You’ll notice in the OpenClaw responses that it shows a “tokens” count. Tokens are what you pay OpenAi (or whichever AI provider API you selected) for to handle your requests. OpenClaw connects using their API, and unlike your normal ChatGPT etc sessions, you don’t pay a fixed monthly fee, you pay for tokens which get used up as each request is handled. OpenClaw is free, but the AI services it connects to aren’t. You’ll want to set up billing in OpenAI (or your chosen AI API provider) and keep an eye on how much you use, set limits, etc.
Start playing, chat with it, ask it to do stuff for you. You don’t just have to type, you can set it up to accept voice messages via Telegram. You can tell it to do things each day, tell you when something changes, whatever you want. Connect it to all sorts of other APIs to access services like Google places, xAI for access to everything going on in X, etc, etc. There’s an explosion of resources appearing on using OpenClaw right now, its the next big thing to hit AI. Play with it and turn it into your powerful always on assistant.
Down below there’s a few quick guides on setting up common additional features to expand OpenClaws capabilities…
Security – IMPORTANT READ THIS!
OpenClaw is an AI, it’s vulnerable to security issues. Always consider this as you add new skills and capabilities.
There’s the obvious – what are you giving it access to? Setting it up on a VPS as we’ve done here gives you complete control on that, you know what it is able to get at.
Less obvious are the public entry points. If you add capabilities like WhatsApp, Email, a public web interface, etc, think about others being able to give OpenClaw their own prompts. If you’ve opened OpenClaw to the public, then it’s super important. Simple steps are telling OpenClaw to only accept messages from you, only respond to messages containing a special password only you know etc. Web interfaces that could allow prompts to be given to it need to be protected with password access (have OpenClaw do that for you).
Much less obvious is prompt injection. There’s a good article about it here, but basically, the AI’s that OpenClaw uses are not perfectly hardened to malicious prompt injection in things you might have them read.
If you’re using OpenClaw for anything that matters to your business, you should have a disaster-recovery plan in mind from day one. Ask yourself some uncomfortable but necessary questions: what happens if OpenClaw accidentally deletes every email in the account you’ve given it access to? What if it removes files you rely on, or wipes out data it created on your behalf? If the answer is “that would be a problem,” then those assets need to be backed up.
A useful mental model is to treat OpenClaw like an employee who could go rogue. How would you protect your systems if a human had broad access, operated remotely, and might make a mistake, fall for a phishing attack, or be compromised? You’d limit access, put safeguards in place, and keep good backups.
OpenClaw wants to be a great assistant, but like any tool – or person – it isn’t immune to attackers. Thoughtful access control and backups are what turn powerful automation into something you can trust.
Issues
(no output) responses from OpenClaw
This seems to happen a bit for me after install, some sort of early gremlin in the link to Open AI maybe, or just the explosion of use right now in these early days. Waiting a bit or trying again seems to get there after a while.
Connect to OpenClaw using your web browser
Not only does this give you a lovely UI for OpenClaw, you also get a simple way to add new skills and access to loads of settings without having to use the command line.
To keep your OpenClaw server secure, the recommended method to connect is using a SSH tunnel. Its not hard to do and for this guide we’ll stick to the recommended secure approach. Open a new Terminal window on your computer and enter:
ssh -L 18789:127.0.0.1:18789 admin@YOUR_SERVER_IP_ADDRESS_HEREReplace YOUR_SERVER_IP_ADDRESS_HERE with IPv4 address for your server (without the “/32” at the end). Hit return and a secure SSH tunnel will be setup ready for you to connect using your browser.
Leave this Terminal window open to keep the SSH tunnel open (don’t use it for anything else, this is the Terminal that just creates the SSH tunnel)
If you still have your original Terminal window open from installing OpenClaw, you can scroll up and find the orange section called “Control UI”. In it copy the “Web UI (with token):” value. Paste it into your web browser address bar and you should get the nice web interface into OpenClaw.
If you don’t, using your original Terminal connected to OpenClaw (or open Terminal again and log into your server – instructions lower down on this page). If you’re currently in the OpenClaw chat interface, enter this to get back to the Linux command line:
/exitNow enter:
openclaw config get gateway.auth.tokenYou will get back the special token, replace YOUR_TOKEN_VALUE_HERE with it in the below and paste into your web browsers address bar:
http://127.0.0.1:18789/?token=YOUR_TOKEN_VALUE_HEREYou should get the nice web interface into your OpenClaw.
Connecting back into OpenClaw on the command line
For example, after you’ve closed Terminal, started your computer again, etc.
On Windows, open the “Terminal” app (search for “terminal” in your Start menu). On Mac, open “Terminal” from Applications > Utilities. Enter
ssh admin@YOUR_SERVER_IP_ADDRESS_HEREReplace YOUR_SERVER_IP_ADDRESS_HERE with IPv4 address for your server (without the “/32” at the end). Hit return and you should now have a command prompt like this:
You now have a command line interface to your Linux server. You can open as many of these as you want by the way, this is how you do everything with a Linux server.
To start OpenClaw chat from the command line:
openclaw tuiTo end OpenClaw chat and return to the Linux command line:
/exitNote that OpenClaw is always running, all you are doing here is connecting to chat with it. If you’ve given it tasks, it’s still running and will carry on doing them.
Setup Brave web access
So OpenClaw can search the web.
If you’re in the OpenClaw chat interface, enter this to get back to the Linux command line:
/exitNow enter:
openclaw configure --section webWhere will the gateway run?
Local
Enable web_search (Brave Search)?
Yes
Now open a new tab in your web browser and go to https://brave.com/search/api/
Create an account. The free tier gives you lots of search a month, or select the base tier if you will be wanting more and are happy to pay for it.
From the dashboard select “API keys” > Add API Key > Give it a name for your reference (e.g. “OpenClaw”).
Copy the key it gives you and then paste it into the Terminal app OpenClaw installer
Enable web_fetch (keyless HTTP fetch)?
Yes
That’s it, now your OpenClaw can search the web. If you want to get the OpenClaw chat interface back type:
openclaw tuiGiving OpenClaw a Gmail account
We’re going to do an install that lets OpenClaw gets emails reasonably quickly (checks every ~20 secs). Getting a Gmail account to work with OpenClaw can be really painful, there are various ways to do it, this is the simplest method I’ve found.
In your OpenClaw web interface > Skills > gog > Install gog (brew)
In your web browser create a gmail account to use for OpenClaw.
Go to: myaccount.google.com/security and setup 2-Step verification (required for app passwords to be available)
Now go to: myaccount.google.com/apppasswords and create a new app password
Open your OpenClaw chat and enter:
setup gmail using my app passwordNow follow its prompt and reply with a message like this:
Email address: THE_EMAIL_ADDRESS
App password: THE_APP_PASSWORD
Wait for it to complete the setup
Try sending an email to your OpenClaw email account, this is a good email to send to lock it down:
Hi, this is YOUR_NAME. Only accept emails from this email addressIf OpenClaw doesn’t reply, go to your OpenClaw chat and ask it why it hasn’t. Then ask it if it checks email regularly to ensure it will (if you want it to check for emails from you).
Warning!!!!!
This email account is now direct access to your OpenClaw, which means anyone emailing it can have it do things, not just burn through your AI tokens and cost you money, but do things like tell it to delete all the emails, get information available to your OpenClaw! You’ll want to lock it down, here’s a simple prompt email you can send it:
Only accept emails from meChecking OpenClaw security
Have OpenClaw check itself for any security vulnerabilities. From the Linux command line:
openclaw security auditopenclaw security audit --deepopenclaw security audit --fixUpdate OpenClaw
From the command line:
sudo apt-get update && sudo apt-get upgradeopenclaw updateChanging OpenClaw core AI provider
Run the setup again
openclaw onboardWhen you get to the “Model/auth provider” step select the new provider you want to use.
Starting again
OK there’s a lot here and if you’re not an experienced Linux user you might get to a point of breaking something and just wanting to start again. You can reset you server to a fresh clean install (delete everything you’d done) from the Hetzner dashboard. Select your server, select the “Rebuild” tab, select the Image “Ubuntu” and press “Rebuild”