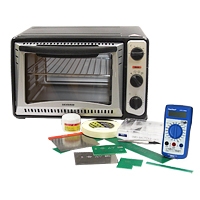
 We we're sceptical when we purchased this but it's turned out to be a great buy. Previously we assembled most prototypes in house using a compressor and precision liquid dispenser to place a blob of solder on each pad, then placing the SMD component on and then soldering each pad with a soldering iron. The Beta reflow kit combined with Beta Layouts free SMD laser stencils is the business and makes assembling SMD PCB's much less painful. It isn't perfect and after reflowing a PCB be ready to go round removing the odd solder bridge and soldering any large components such as big Elect capacitors that haven't reflowed. However we've happily soldered down to 0402, 0.5mm pitch components and IC's with underside GND pads (not BGA's!) and had very few problems.
Tips
Get the reflow controller with the oven – it's essential for a proper reflow profile.
Keep an eye on the final dwell stage and if you see all of the pads have reflowed including large Elect capacitors turn it off and open the door. Occasionally it can leave the reflow on a bit too long, possibly when we've not ensured a good bond from the thermistor to the PCB, and it's better to be safe than risk burning components. That said the only components we've damaged through over heating are poly capacitors.
The heat isn't perfectly even – the centre of the oven will reflow before the edges, so make sure your thermistor is reasonably near the centre so that it is sensing the hottest area. Also don't expect the oven to reflow a PCB that's as big as it's width or depth – the edges won't reflow fully and you'll need to do it by hand.
Touch up any soldering as soon as the reflow is done while the PCB is still hot – makes the task much easier.
The Beta Reflow Kit

